At Call of the Sea, if you’re stuck and need help, you’ve found the right place to be. Here you’ll find the answers to each puzzle. From the opening sequence to the final credits, this Call of the Sea strategy guide and walkthrough will show you the way to ace each stage, revealing every puzzle’s solution and hidden object on the island along the way.
Contents
CHAPTER 1
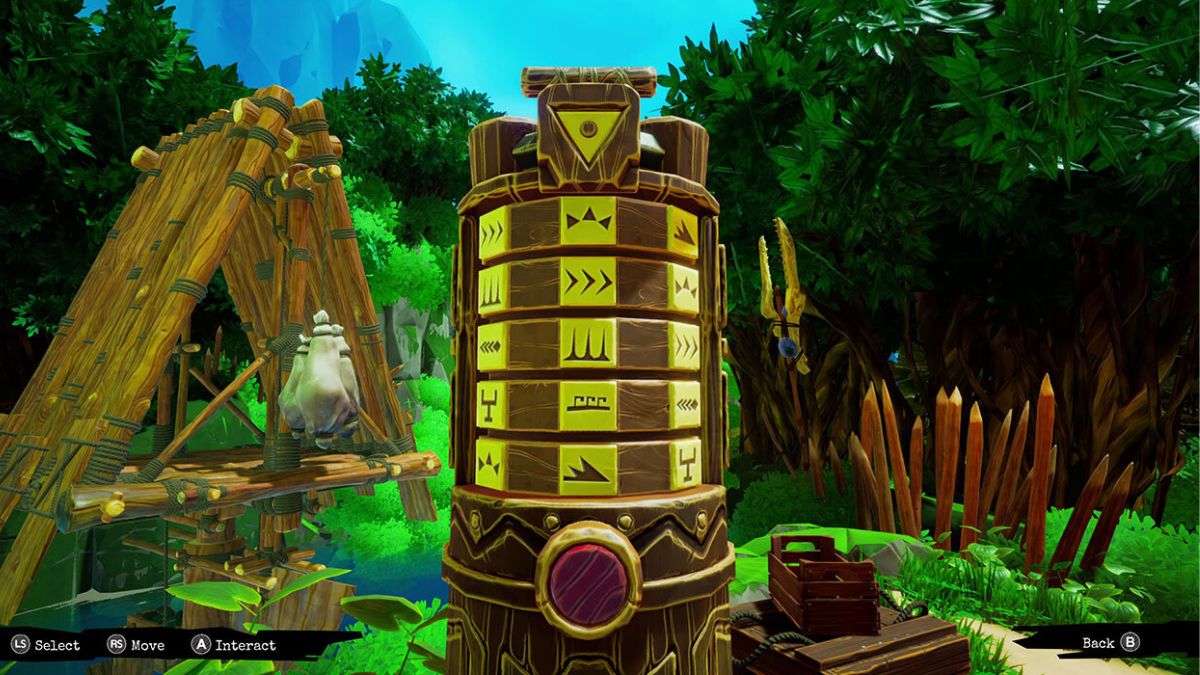
It’s unlikely that you’ll be left scratching your head over Call of the Sea’s first chapter’s lone puzzle. There are four red totems, each with a different symbol, dotted across the game’s initial region. Each time you engage with one of them, Norah will draw it in her journal.
You can’t proceed to the next section of the game unless you drop the bridge by placing these four symbols in the correct arrangement. In a literal sense, you put them in the order that makes the most sense. Hence, fish are at the bottom, followed by the ocean, then the mountains, and finally the birds and the sun.
CHAPTER 2
Call of the Sea’s second chapter introduces a few few more layers of difficulty by throwing a few challenges at you. Here is the recommended sequence for completing them in the game.
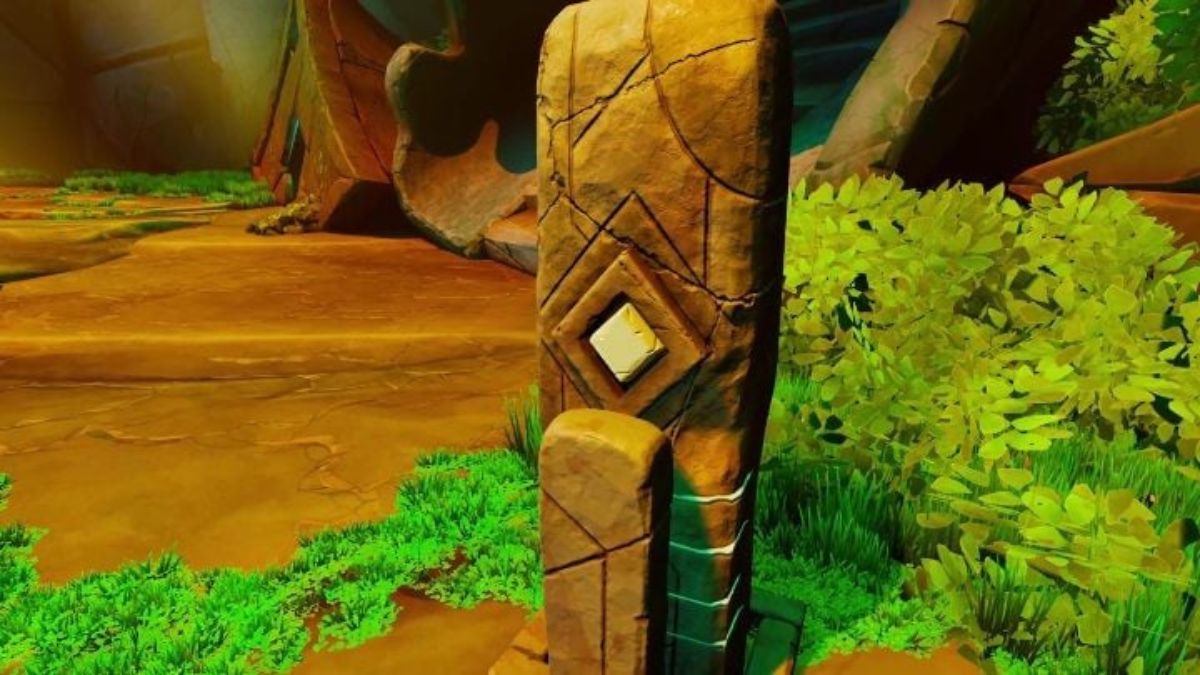
There are three huts at the beginning of the chapter, and each one has a totem in front of it. Norah will sketch all three of them if you look at her journal. Go on to the shack that may be found behind the one to the left of the chapter’s beginning. There is a short stretch of bush that you’ll have to navigate. Here you will find the fourth totem.
You should now climb up and around the cliff to the two shacks placed above the ledge. In the first, torn pieces of paper are spread out on a desk, and you can move them to fix the picture.
Now that you have the image fixed and the totem sketches, you can use them to choose which of the totems in the hut’s centre best represents you.
You’ll find a device that takes you up a lift in the first area of the chapter in the secret compartment. It’s right at the beginning of the chapter.
You can hear whispers if you go underground and interact with the gaps in the walls. Repeat this process three times to fill Norah’s journal with fresh sketches of her eyes.
Pass through the side and emerge from the other end to lower the bridge and return to the hut with the totem puzzle. Go through the door on the other side of the hut and use the machine on the desk to activate the next puzzle.
You have burn holes that match the three images in Norah’s journal. You can put the burnt-lens on top of the telescope in the hut’s corner. If you flip through Norah’s journal, you’ll see an all-new picture. Use the picture to activate the switches on the ground, beginning with the star icon.
As an alternative, you can also check out the comprehensive guide to other games:
- A Walkthrough To Completing The Destiny 2 Root Of Nightmares Raid
- How To Play Pokemon Dark Worship? A Full And Comprehensive Walkthrough
CHAPTER 3
At the beginning of this chapter, you’ll find yourself washed up on a beach, staring at a massive damaged ship. Initially, you should go inside the ship, up a ladder, and locate the generator so that electricity may be restored.
To activate the generator, pull the levers in the following sequence: 3,2,4,1.
Follow the sound of a voice deeper into the ship, and you’ll find a room with three black rocks and a strange science experiment. Turn the three knobs until the three green icons light up at the same time. Norah will then record the resulting three numbers in her journal.
Pull the level to send the power running outside, then leave the area and head for the stairway to exit the ship. A switch outside the ship lights the main camp ahead of you, and another switch in the archway lights the little cave linking the two. From here, things start to get a little more difficult.
Norah will keep in mind that you need to go around the back of the big ship and into the nearby little camp in order to get a calendar. Then climb the rocks until you reach the chapter’s major puzzle area. There’s a big hole in the ground, a pedestal right in front of it, and switches and valves all around you. You can check the water level by following the right set of stairs down to a rock with an inscription. This will be noted by Norah.
To reach the smaller cave, return to the main camp area and pass through the arch. You should check the tent, where a projector is being used. If not, trace the wires to the floor to locate the missing power switch that will allow the ship’s systems to communicate with one another.
If you turn on the projector and move to the third slide, Norah will say that this is the one. This is due to the fact that the symbol for the water level coincides with the one she remembered seeing before.
A little device resembling a keyboard is set up on the bench nearby. If you hit every key from left to right, Norah will quickly list down entries in her journal.
Getting back to the huge puzzle portion with all the valves is next. You can check whether symbols on the keyboard correspond to the three digits you found in the rock puzzle by checking your journal.
Then, we take those three symbols to the chart on the next page, which will tell us what symbols they match up with based on the current water level. The three valves shown by the plus signs are the ones you want open, while the others should be closed. You can check the tweet below in which Call of the Sea is free on Epic Store.
Four valves are located in the main area, one is located down a set of stairs to the left, and one is located down a set of stairs to the right, all near the water level symbols.
The final step is to position the large hole’s valve over the solid black icon. As the in-game date is November 7 (as noted in Norah’s journal’s “notes” section), and since the calendar you previously found indicates that this is a new moon, this is the case. To go to the next chapter, activate the pedestal with the valve symbols.
CHAPTER 4
This section is much shorter and simpler than the one before it. There are two main puzzles, but they’re not too hard. You need to turn on four things made of stone. There are three in the main area of the chapter and one that has fallen over in the destroyed camp to the right of the level’s entrance. Each one includes 4 buttons. Each of them requires a specific button press. The process is easier than it sounds.
Norah will record a symbol on the floor in the main area of the level, in front of the large locked door, in her diary. You can use that symbol to figure out on each stone tablet what button you need to press.
To solve this puzzle, go behind the gear, turn the wheels anticlockwise until the hole is at the base, and then pull the lever on the opposite side. Now that you’ve solved the previous challenge, you can enter the final one and turn on the power so that all seven holes light. If you follow the cables around the level, you’ll find the switches and can turn them all on.
After some story stuff, you will open the big door and enter the temple/cave. At some point, you’ll take an elevator to a floor where there are four murals, each of which has a rotating circle placed directly below it.
You can look at a lot of things here, and Norah will write notes in your diary to help you figure out the puzzle. You just need to turn the dial to one of the positions (1–4). The answer is provided down below.
- Transformation = God’s Blood (1)
- Liquid = Transformation (2)
- Life = Water Animal (3)
- Eternal = Water Animal (3)
Once you do that, the door at the room’s back will open, revealing the solution to the puzzle. You have to listen to what note is played on the drum in the next room and then hit the right drum(s) back.
Left to right (1, 2 or 3)
- 2
- 1 – 3
- 2 – 3 – 1
- 1 – 2 – 1
- 3 – 3 – 1 – 2
- 1 – 3 – 3 – 2 – 2 – 2
This concludes Chapter 4 of the game.
CHAPTER 5
Outside the first chapter, Chapter 5 is the most elementary. Except one puzzle, most of the game takes place in water and consists of short parts featuring simple puzzles that rely more on timing than on intelligence.
Many times throughout the level you’ll have to swim against the current, therefore being able to reverse its flow will be important. To open the doors or activate the object, you must direct the water flowing below it to meet in the centre at the same time.
The hardest version of this puzzle is at the end of the level. When you get to a large area with several huts, you have to turn on five totems in a certain order. Norah notes the five symbols on the pole that reveal the order, which may be found in the journal’s bottom part. Every totem connected with a particular set of symbols would be displayed either outside or within a hut.
The order is:
- White hands (left of the entrance of this area).
- Orange hands (very top level).
- Red hands (one level down from orange).
- Line marks (right of the entrance of this area).
- Purple swirls (straight ahead of the entrance of the area).
To complete the sequence, press the switch located outside the hut with the purple swirl.
CHAPTER 6
Chapter 6 is the last part of the game, and all of the puzzles take place under a roof. As soon as you reach the beginning of the level, turn right and put your hand inside the stone circle to get a tattoo. Next, you’ll need to cut your hand, then use your blood to unlock the tablet that sits in front of the pyramid.
There are two buttons, one to your left and one to your right, that, when pressed, cause four circles to fall into the centre of the room. Now, take a look at the four doors surrounding the room and add the star constellations on them to your journal.
The four circles that have appeared in the centre of the room each contain a single selectable symbol: the mark you got tattooed on your hand outside. The rest of the level requires you to use the symbols on your hands to make one of the constellations on the doors; behind each of these doors is a new tattoo, and behind that, a new symbol.
There is a star on the ground next to the doorway. It’s similar to the one used to solve the floor puzzle in Chapter 2. If you want to figure out how to make any of the constellations, you should stand in that spot and face that way.
Now that you know you can only use one symbol at a time, you can use the four circles to activate whichever constellation you can make out of that one sign. If you wish to figure out the solution on your own, the door you need to go through is the one that is to your bottom right when you are standing on the star.
Turn on the two symbols in the top right corner of the circle, and the symbols on the left side of the circle. You’ll get the second hand tattoo and symbol inside the room.
Once you’ve done that, head back to the main area and switch off the symbols before stepping onto the star. If you continue to the right, the next door you’ll enter is the very last one. You can also check the official tweet by Raw Fury below.
There is a small puzzle to solve in this room. All you have to do is press one of the three buttons in front of you to move the black statues around the room. You should spin the one in front of you so that one of its sides is now facing you and the other is pointing to the right.
Then turn the black statue next to it so it faces the other statue, and the two of them will make a bridge. Now, press the big button to make the platforms move, and head over to the buttons there. The white statues are moved around the room by these ones. To use these as bridges when you rearrange the black blocks, you’ll need to shift these first.
You will get your third mark and tattoo. In order to stand on the star, you must return to the main room, disable the symbols, and then do so.
The door in the bottom left corner is the next one you’ll open. It has a small group of stars on it. Inside, you will find the third tattoo and symbol on your hand. You can turn off the symbols in the main area and stand on the star. Only one door remains, and you’ve already figured out which one it is.
After obtaining the fourth and final hand tattoo and symbol, your mission will be to return to the main room and use this information to unlock the large door in front of you. But there’s no star pattern on it! If you look up at the night sky, you’ll see the star pattern you need to make on the floor. And with that, there are no more puzzles; enter the building and go to the game’s end.
That’s all we know about the gameplay of Call of the Sea. If there will be anything new, we will surely add to this post. If you want to know more, please visit our website, talkxbox.com.